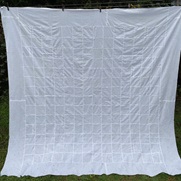
Star Power Quilt Supply List
Traditional Whole Cloth Quilt
Yardage Amounts
To view the
Traditional Whole Cloth Quilt Fabric Requirements
in a pdf file
Click Here
This class project has three sizes -
Wall Quilt
- 56 x 56 inches
Twin Size - 56 x 86 inches and
Queen Size - 86 x 86 inches.
Other things you will need to complete
the class project
Piecing
You will need basic sewing supplies and basic sewing/quilting skills to piece the quilt top.
Quilting
Thread - we will be using three different threads for this project.
Basting Thread - Because of the feather / pattern placement we will be basting the quilt top before the actual quilting. You will get complete details on how to do this in the class videos. When basting a quilt top, I prefer to use a high sheen polyester, or any other "slippery" thread in an "obnoxious" color such as international orange or neon pink! These colors stand out and the slippery thread pulls out MUCH easier than cotton thread!
Feather Quilting - For this quilt, we WANT the quilting to show! For the feather work I highly recommend using a contrasting thread color for the quilting! We are also going to be making a LOT of registration lines and a contrasting thread will make your quilting "stand out" and be much easier to see!
Fill In Stitching - For the background, fill in stitching use a thread that matches your fabric. We want this quilting to "disappear" into the fabric.
Markers
 We are going to making registration lines - a lot of them - on
the quilt top.
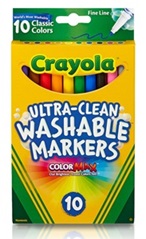
I recommend using the fine point Crayola Washable Markers. These markers will disappear after you wash the quilt with warm water and detergent. The marker will NOT disappear with water ONLY.
I would strongly recommend purchasing a new package of the Crayola Washable Markers for this project. We are going to be using several different color of markers when working on this quilt.
Piecing Plastic for Templates
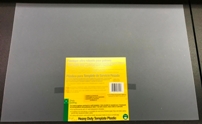
For the quilting in this project we are going to need templates which we will be making at the beginning of the class.
For best results use a translucent plastic material. You will need to see through the plastic to properly place your template before quilting.
I prefer to use the Dritz Heavy Duty Template Plastic as shown in the photo above - which is sold in 12 x 18 inch sheets. You will need two (2) pieces of this (or any other translucent material) that measures about 12 x 18 inches.
You can purchase this piecing plastic at your local quilt shop or at Joann Fabrics or other large fabric / craft stores.
Plexiglas for Quilting Designs
If you would like to practice your quilting before stitching, I HIGHLY RECOMMEND that you get a piece of clear Plexiglas that will fit in the workspace of your quilting machine. (Plexiglas of this size should be about $15 or less.)
Before using the Plexiglas, take either masking or duct tape (which now comes in many different colors) and place it over the cut edges of your piece of the Plexiglas. The tape serves two purposes. 1) It protects the edges of the Plexiglas. Sometimes the edges can be a little sharp and could scratch you or tear the quilt. 2) The tape will also make a boundary or edge around the Plexiglas. This will prevent you from accidently drawing off the edge of the Plexiglas.
For a FREE video on how the Plexiglas works Click Here
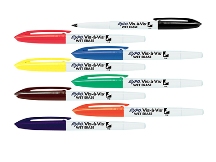
You will then use markers - I recommend the Vis-a-Vis markers, available at all "big box" office supply stores, for marking on the Plexiglas. (Note: the Vis-a-Vis markers usually have 5 in a package and cost less than $10.) The marker is removed using a damp paper towel. See below left.
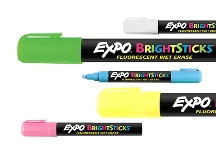
For marking on Plexiglas on top of dark fabric, I have found that the Expo Bright Markers work very well. See below right.
Both of these markers can be purchased in major office supply stores such as Staples, Office Depot, Office Max, etc. They can also be purchased online.
Click on any photo for a larger view and slide show
REMEMBER this is a LEARNING project! This project does not need to be perfect. World peace does not depend on perfect piecing or quilting!!
Back to Class Information Page
